To connect your Tesla with the Power Platform, the easiest way is to use the App Tessie with their Tessie API. With well-documented endpoints across 24 categories, it's straightforward to get started once you've created your account.
Start the custom connector wizard
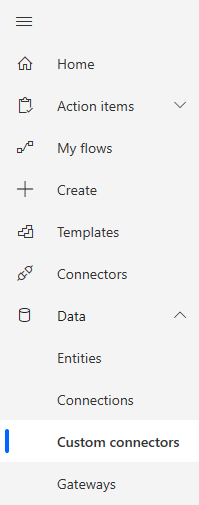
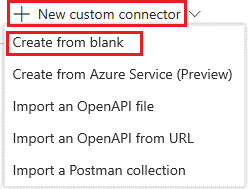
To begin setting up your custom connector, navigate to the Custom connectors section under Data on the left pane, then select + New custom connector on the right corner. From there, choose Create from blank, insert a connector title, and proceed to configure your custom connector.
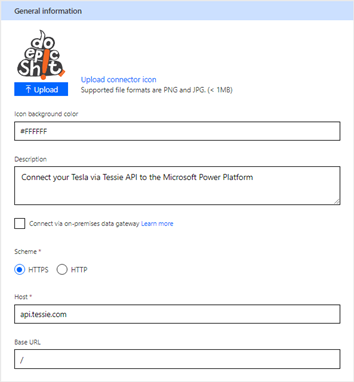
Update general details
On the General tab, we need to define 2 mandatory fields with Scheme and Host. I recommend also to give a proper description and also a nice icon. As host we will set api.tessie.com and scheme is HTTPS.
Security
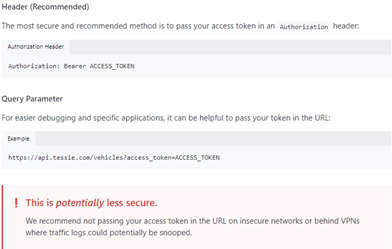
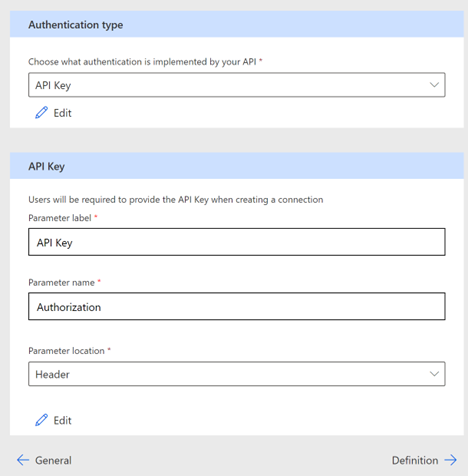
For security, our Tessie API is secured by an API key, which can be passed via Header or Query parameter. In either case, define the authentication type as API Key and follow the instructions in the image.
Create the connector definition
The custom connector wizard gives you options for defining how your connector functions. I will explain the UI and cover a few options in this section, but I also encourage you to explore on your own.

Create an action
The first thing to do is to create an action that calls the Tessie.API GetCharges endpoint.
General
And then we need to define general information’s. Summary, Description and OperationID. This is the unique string used to name the operation. In our case we will use the same name like the endpoint in the API definition Charges and the HTTP Verb Get. GetCharges
Visibility = none
- none: displayed normally in the logic app or flow
- advanced: hidden under another menu
- internal: hidden from the user
- important: always shown to the user first
Request Area
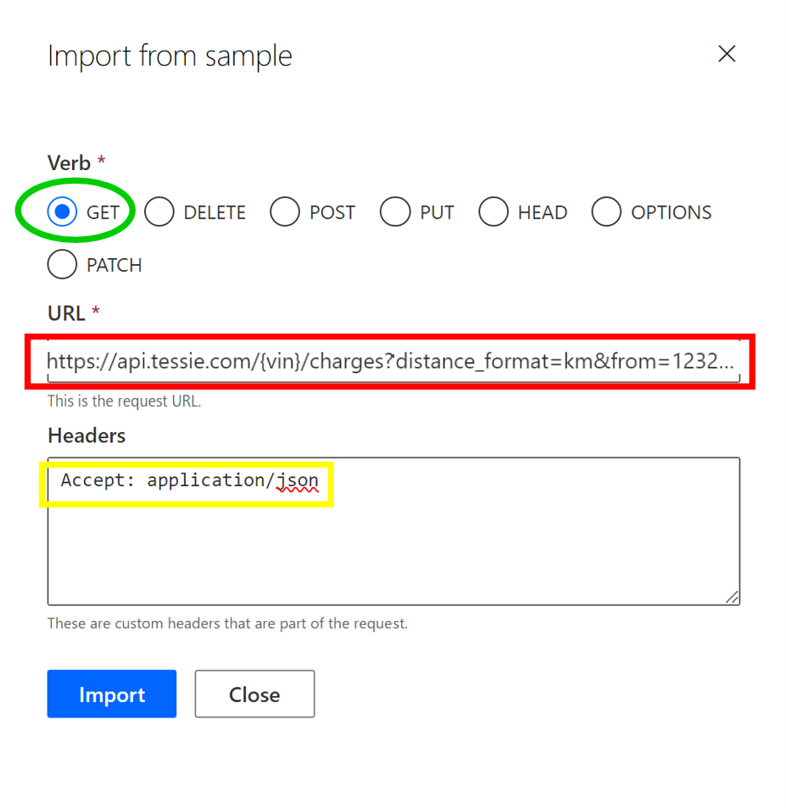
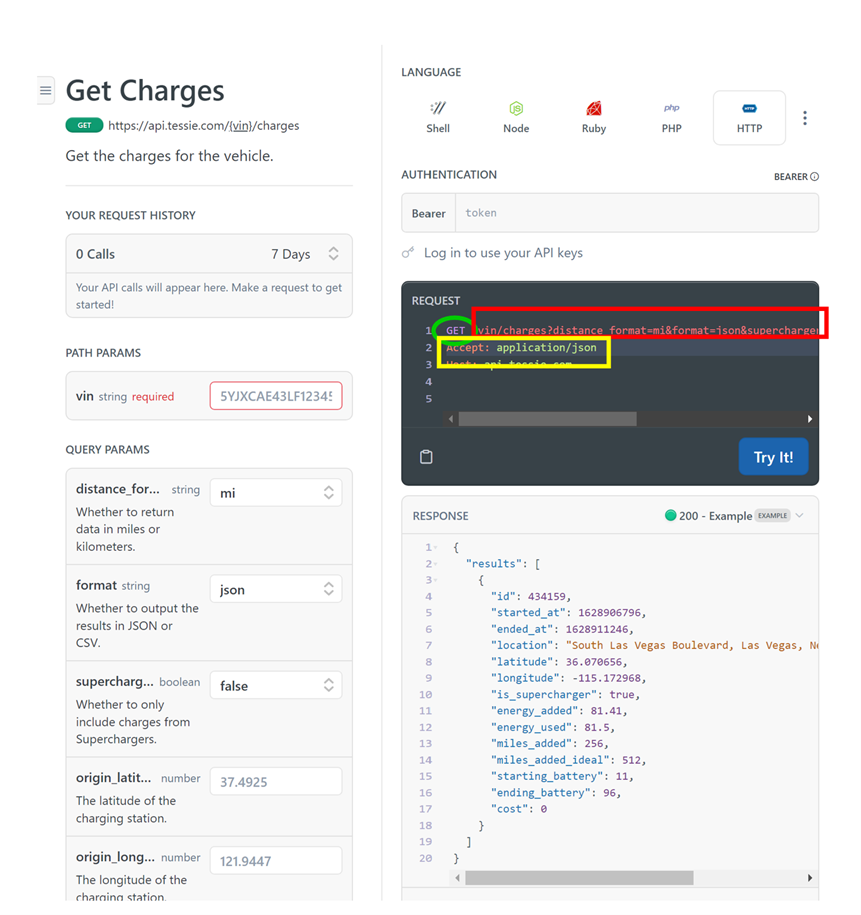
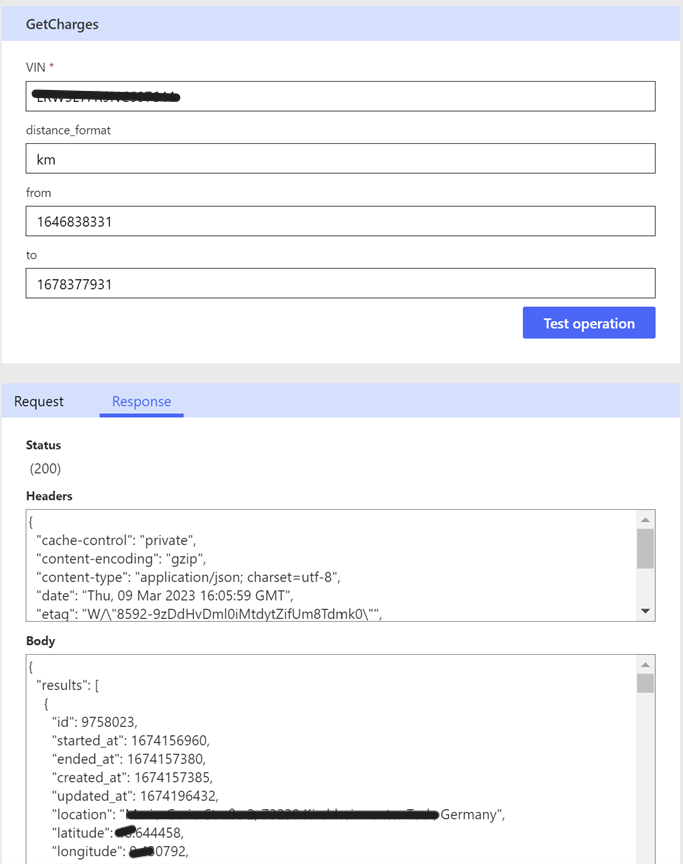
The request area displays information based on the HTTP request for the action. Select Import from sample. From there on it’s an API definition copy paste job. You can fine tune your action and remove only the parameter you really need. In my case I will just leave distance_format, from and to in my url. https://api.tessie.com/{vin}/charges?distance_format=km&from=123213&to=123123
for the strange date numbers at from and to see my other post Unix epoch time.
After you import your sample you will see your request. In the path section is your VIN and your defined query parameters can you find at query.
You can update the definition for each parameter. Check here Microsoft Learn
Response Area
The process for defining the response is similar. Click Add default response and perform your copy-paste job from your definition. Import it, and then click Default. Your response payload is now parameterized in Power Automate. After this, you're ready to test and use your custom connector.
Test your connector
Now that you've created the connector, test it to make sure it's working properly.
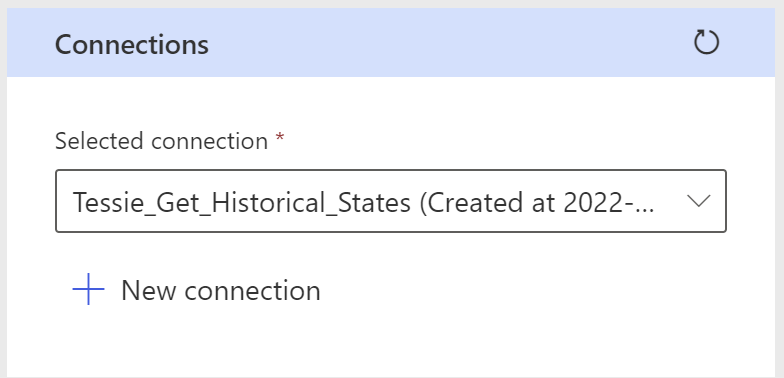
- On the test tab, select New connection.
- Enter the API key from the Tessie API with Bearer {token}, and then select Create connection.
Return to the test tab in custom connector and refresh with the refresh icon at the connection section.
In the section Operations enter your request parameters and click Test Operation.
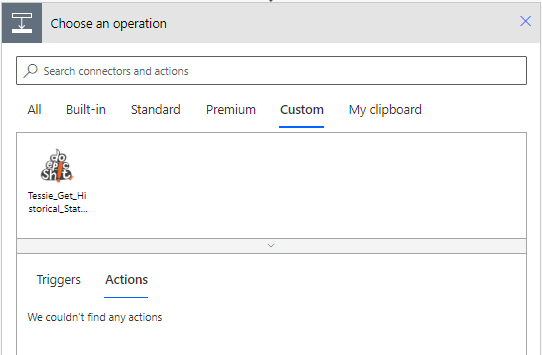
Custom Connector in Action
Create a new flow and choose new step and then add an action. You can find your connector in the Custom tab or simply search for the name. Enter the values you defined in the custom connector wizard.